Daily Use Guide
Daily Use Guide
How does the Bamboo Rollout Manager work once everything is setup?
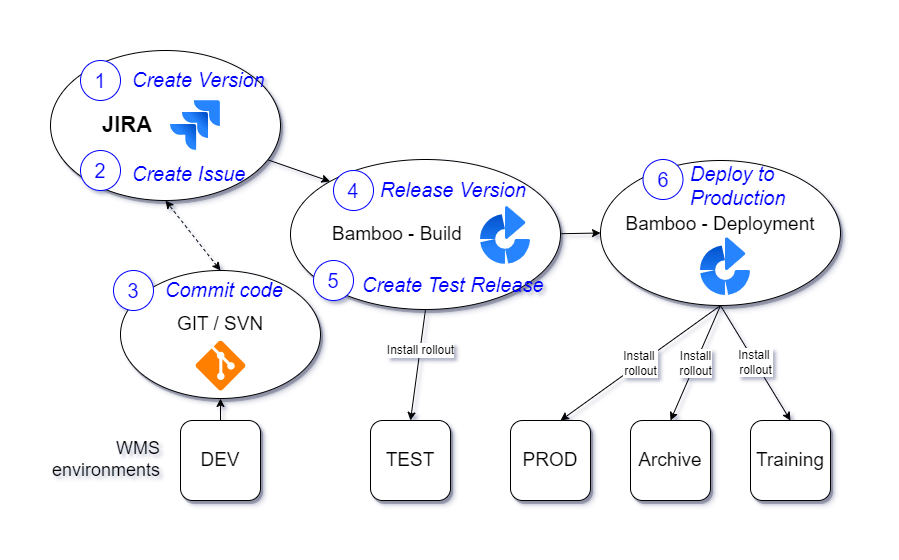
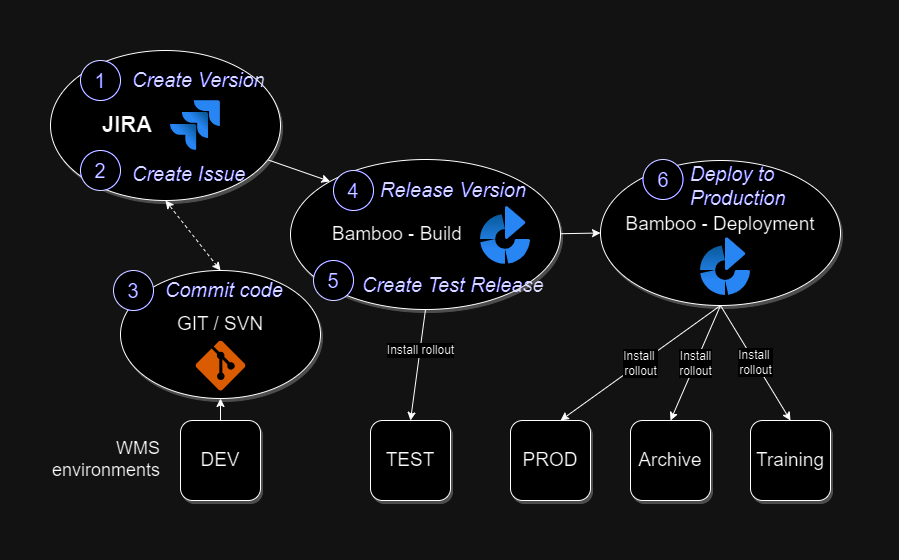
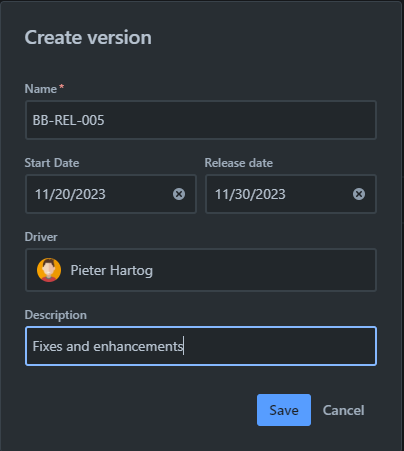
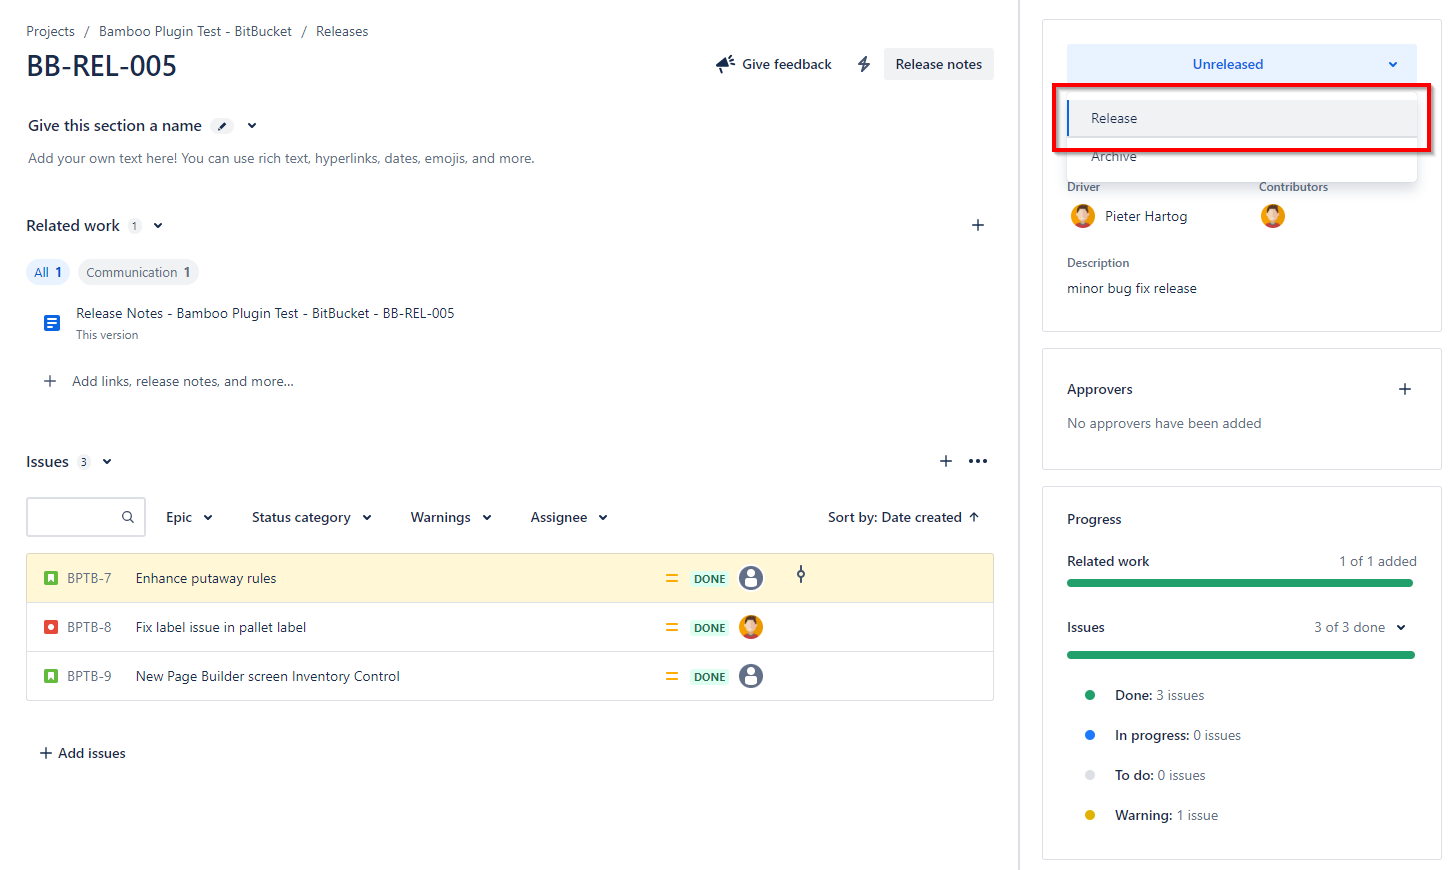
Step 1: Create Jira version
In Jira, in the 'Releases' menu, create a version for every rollout we plan to release. This can be weekly, or just ad-hoc releases, depending on our release schedule and (Agile) method we are using.
Creating a version in Jira can be done in different ways. See instructions on how to create a version here.
We can link release notes, release schedules and other documents to Releases in Jira.
The popup screen where the Jira version is created:

Step 2: Create Jira issue
Create one or more Jira issues of any type and link it to the Version we created earlier via the field 'Fix Version'.
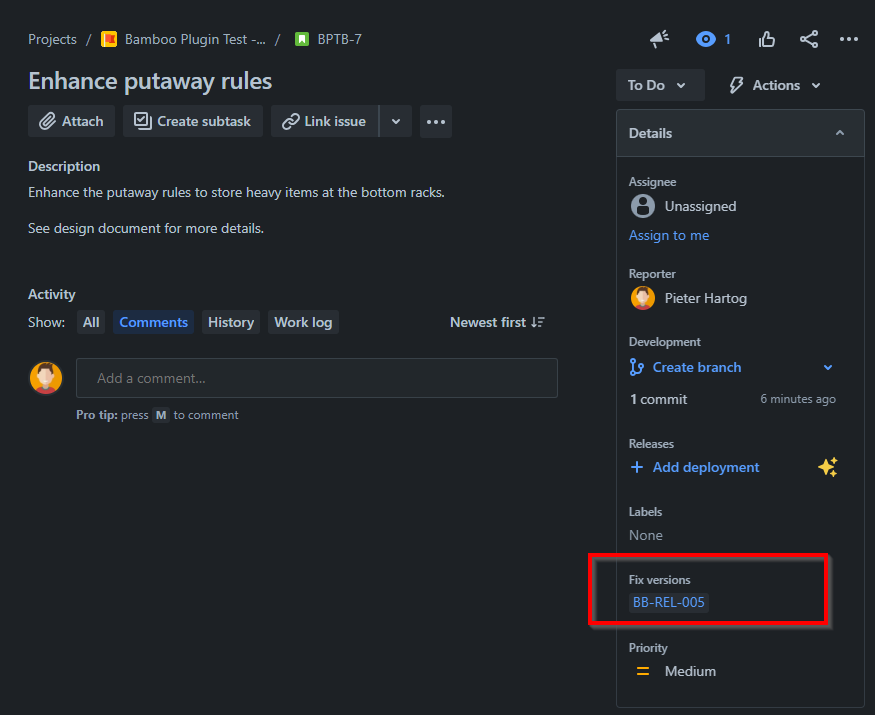
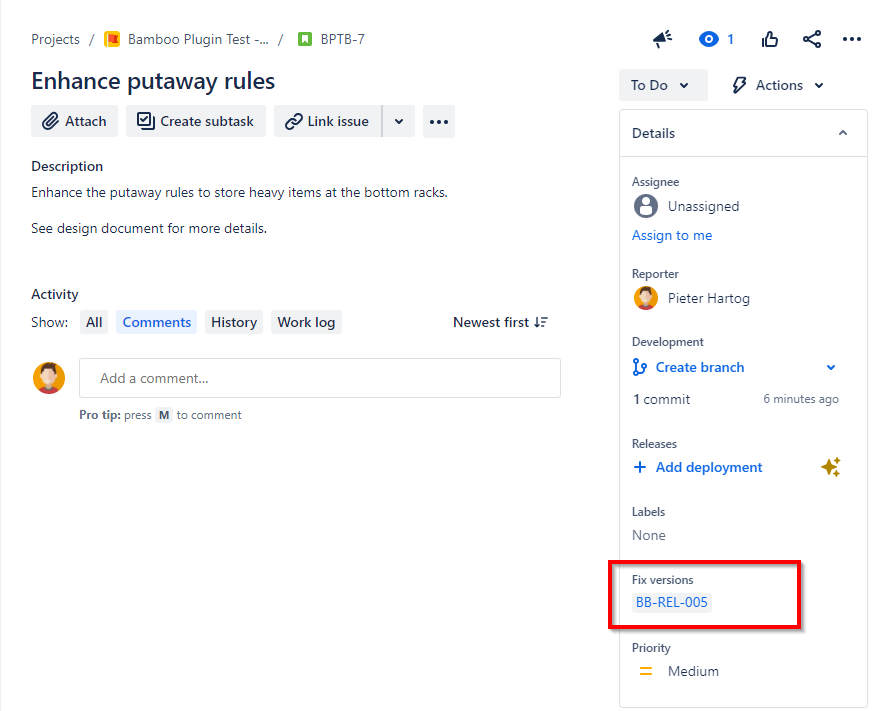
The Fix Version field links the Jira issue to the Jira version we created earlier. The type of issue or other fields are not relevant for the Bamboo Rollout Manager for Bamboo.
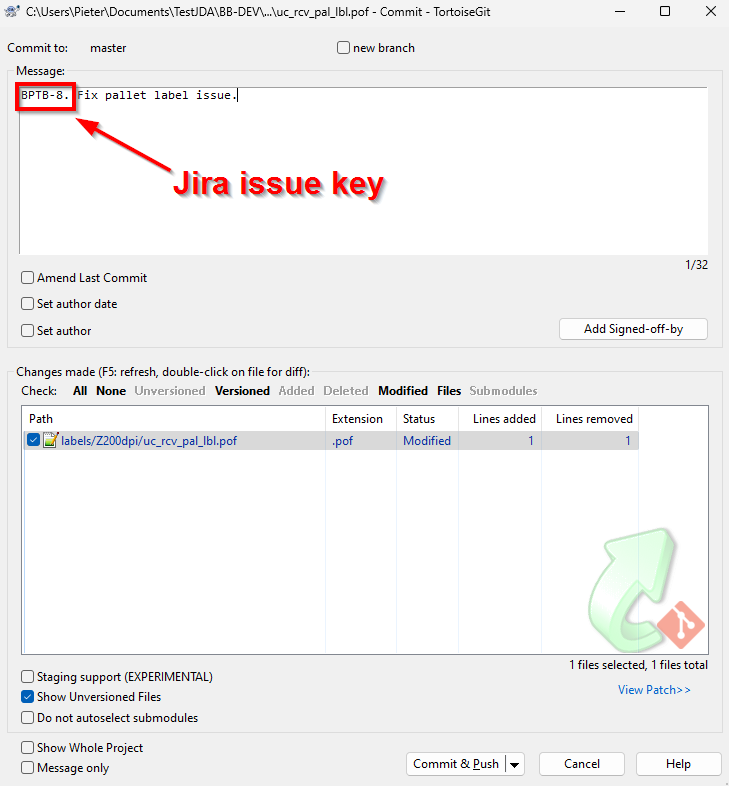
Step 3: Commit code
The Bamboo setup assumes we use a git-based version control system to commit code.
The link between the Jira issue and the committed code is made by adding the Jira issue key (e.g. 'JDA-123' or 'BY-487') in the commit message of the commit. See example below of a commit using TortoiseGit:

Step 4: Release version in Jira and automatically create rollout(s)
Release a version in Jira by going to the Jira 'Releases' screen, select the right version and click 'Release'. In this same release screen, we can generate release notes, inform others or create other documents, for example a testing plan.
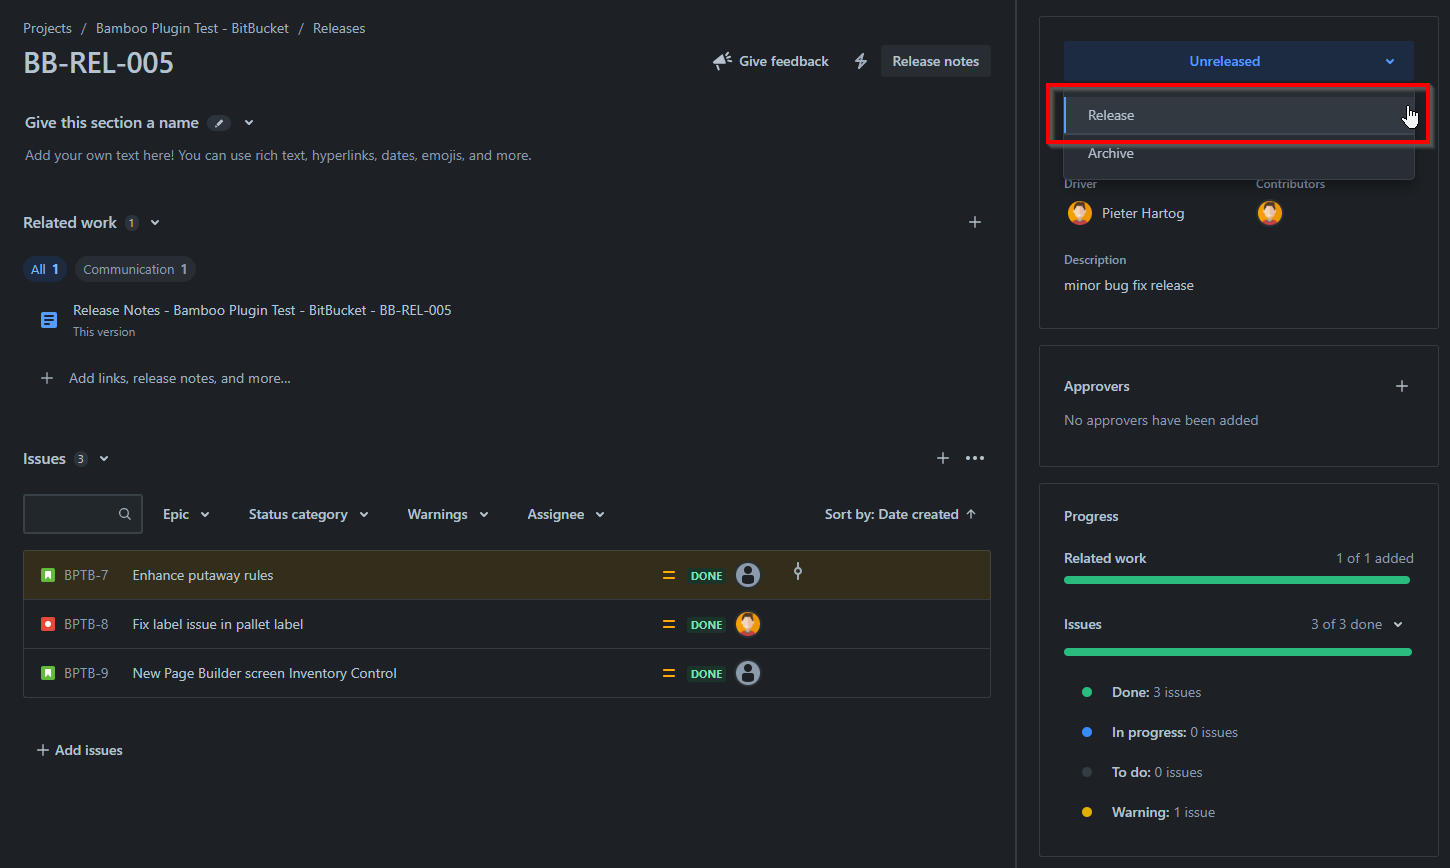
When clicking the Release button, we can enter a few more details and confirm the release:
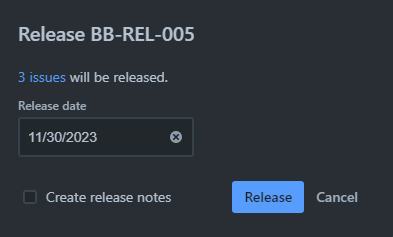
In the background in Jira, an automation rule triggers the build of a rollout in Bamboo when we release a version in Jira.
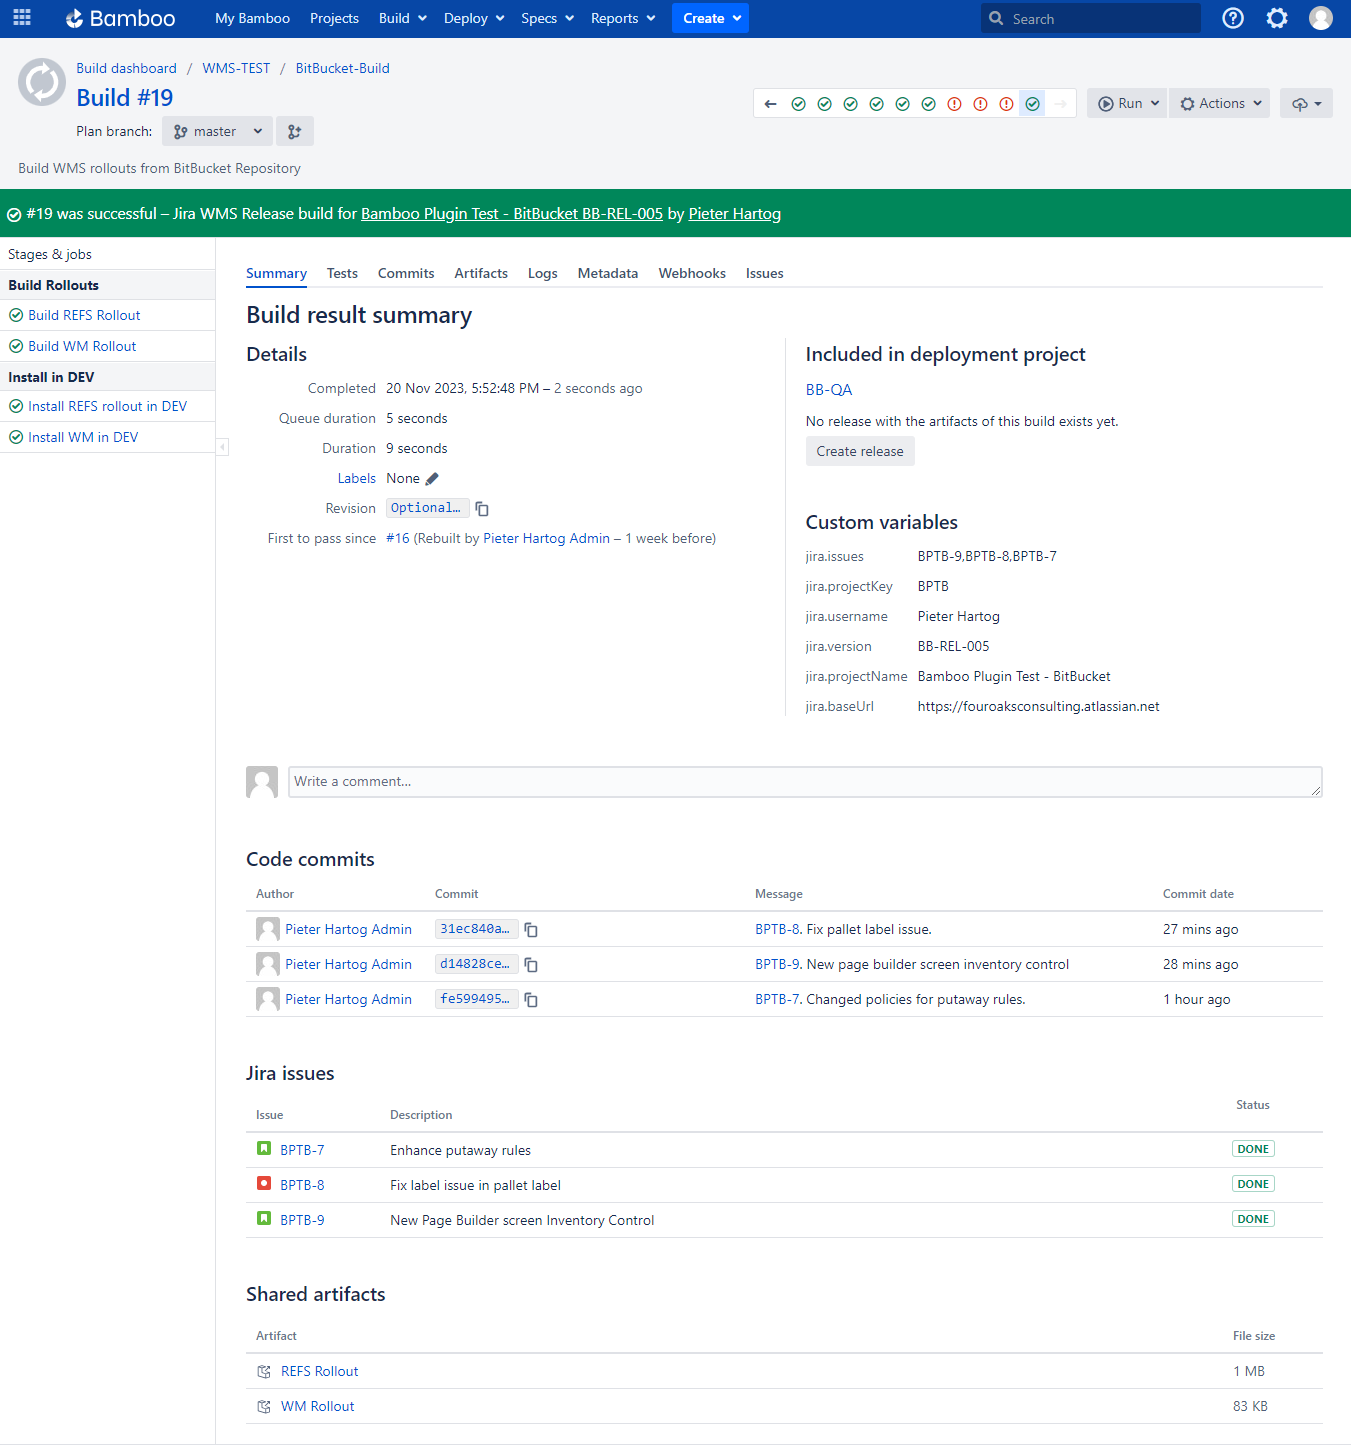
Depending on how the Bamboo build plan is setup, Bamboo will only create the rollouts or we can install the rollout in our DEV or TEST environments as part of the initial build.
Below is a sample build screen after the the build is completed in Bamboo. It has all the info what is in the build, links to Jira issues and commits, and links to the rollouts (artifacts) that are created in this build.
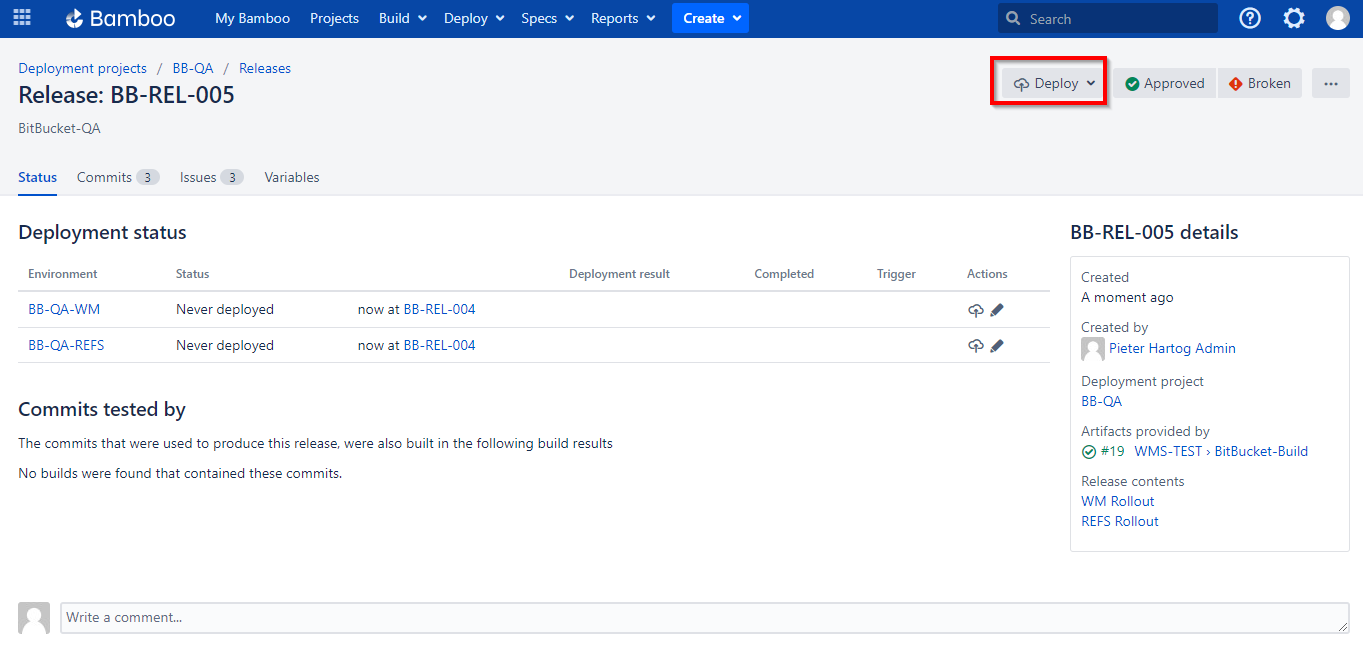
Step 5: Create test release in Bamboo
Once the build is completed and the rollouts are created, we can create a test release in Bamboo which we can deploy to our WMS Test environments.
If the testing reveals more issues that need to be fixed, we can either add Jira issues or commits to the existing Jira version and re-create the rollout, or we can choose to create a new release in Jira.
Releases in Bamboo can be approved and we can link Jira issues to it. This makes it ideal for tracking it during testing and really test one specific version of the changes. It allows us to manage code changes that were made to fix issues discovered during testing.
Step 6: Create production release in Bamboo and deploy to production environments
Once manual and/or automated testing is completed and approved, we can create a production release in Bamboo.
The production release in Bamboo can be installed at any time in the various Blue Yonder WMS environments.
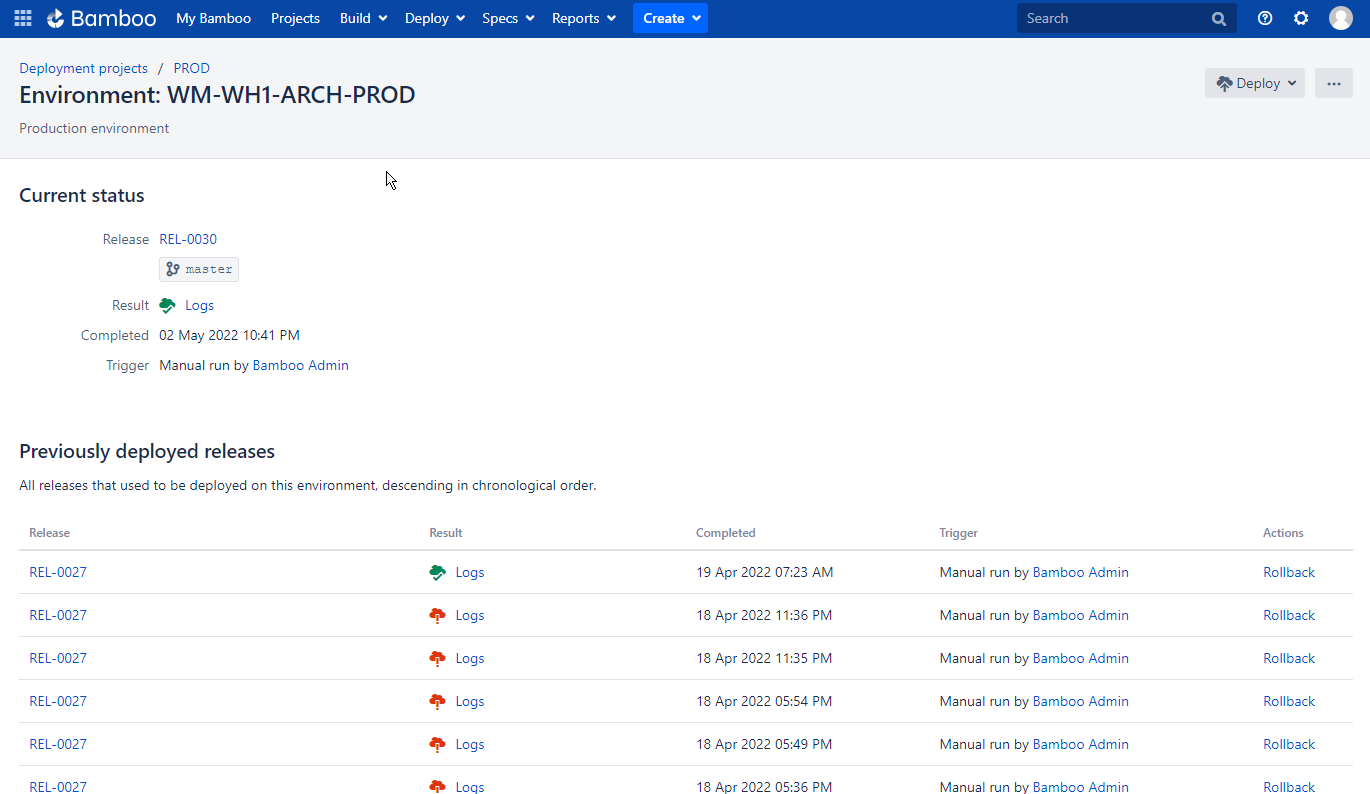
Once the production release exists in Bamboo, we can deploy it to the various production environments based on a schedule, a trigger or just manually by clicking the 'Deploy' button. A trigger could be 'when installation in Production finished, install the same rollout in the Archive environment'. We can chain all installations together to have them installed back-to-back, or schedule it to be installed at the same time, or any combination of the two.
We can start with the Release screen, the deployment project screen, or the screen where we look at a specific environment. The screenshot below shows what the deployment screen looks like.
Step 7: Enjoy a complete overview what is installed where
Once Bamboo releases are deployed, there are multiple overviews to see what releases are installed where. With these overviews, we can quickly troubleshoot potential issues that arise after the new release is installed. We can see quickly and precisely what code was changed and if it could have caused the production issue. Also, it provides a good overview which environments have been updated.
See the installation history in each environment
See the content of each release
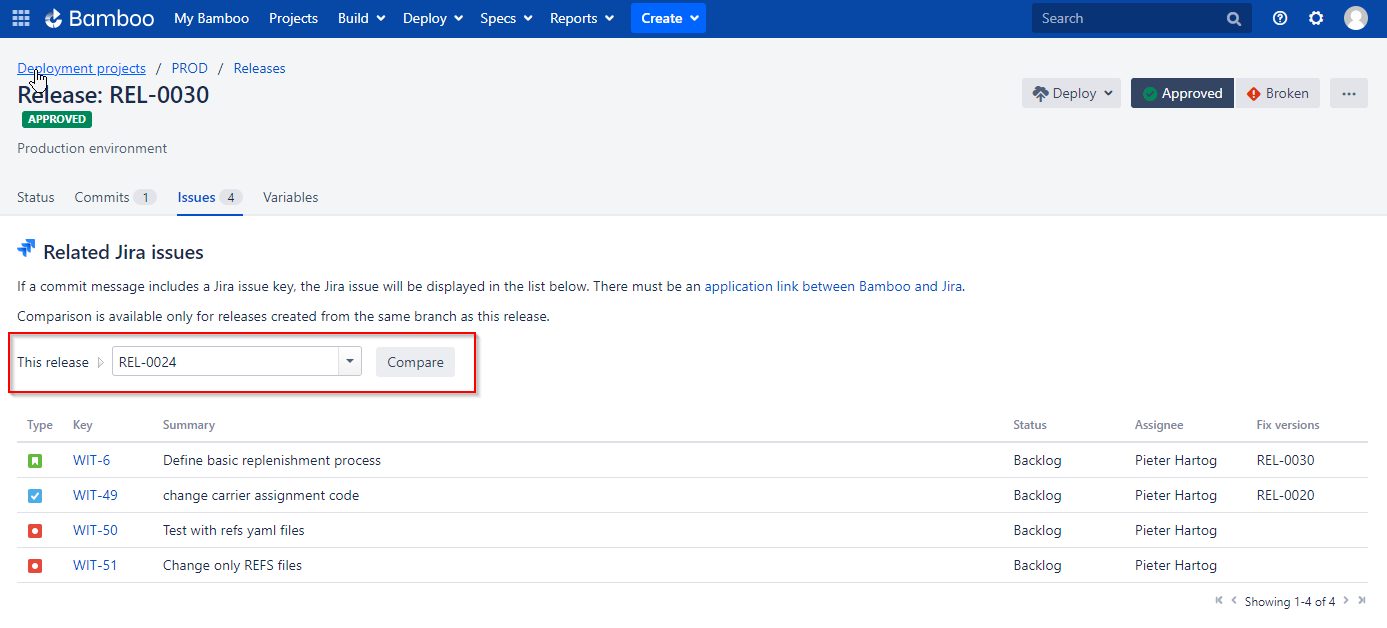
See the diffs between several releases