Getting Started
Getting Started
How to setup Bamboo and the Bamboo Rollout Manager plugin.
Tips
Four Oaks Consulting provides services to assist in this setup. Contact Four Oaks Consulting for more information.
The setup described on this page is for a scenario with just the basic environmens: DEV, TEST and Production.
Prerequisites
The following systems should be in place when starting the steps in this setup guide:
- Subscription to Atlassian Jira Cloud.
- Blue Yonder WMS installed in a Windows environment
- One Blue Yonder WMS DEV environment setup with the LES directory version controlled by Git (see instructions below).
- Subscription to BitBucket or GitHub to view the version controlled files from the LES directory, and for Jira and Bamboo to see the code changes.
- One Blue Yonder WMS TEST environment setup (not version controlled)
- One Blue Yonder WMS Production environment setup (not version controlled)
- An environment with Java 11 to install Bamboo 9.3+ and the Bamboo Rollout Manager plugin. This can be done on the Blue Yonder WMS DEV server, but a separate server works too.
Architecture
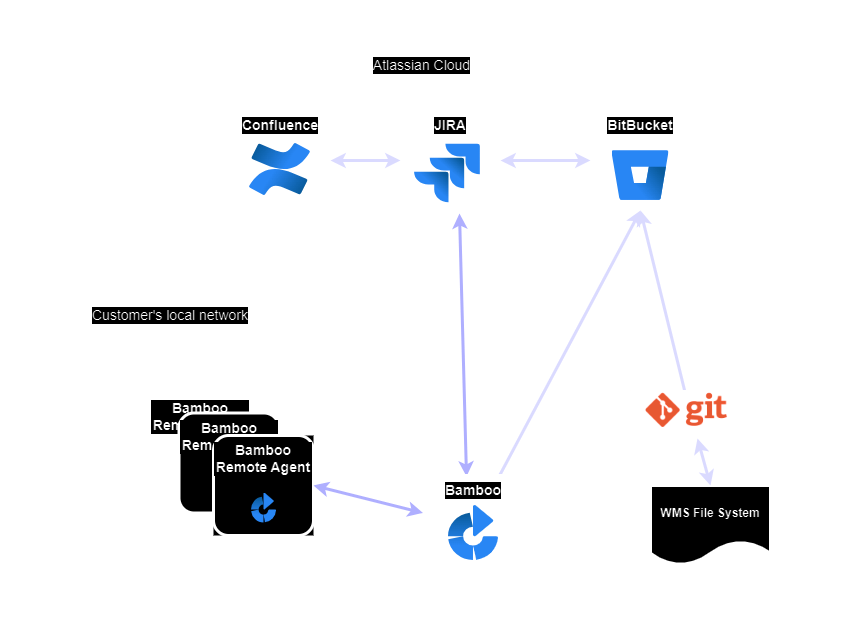
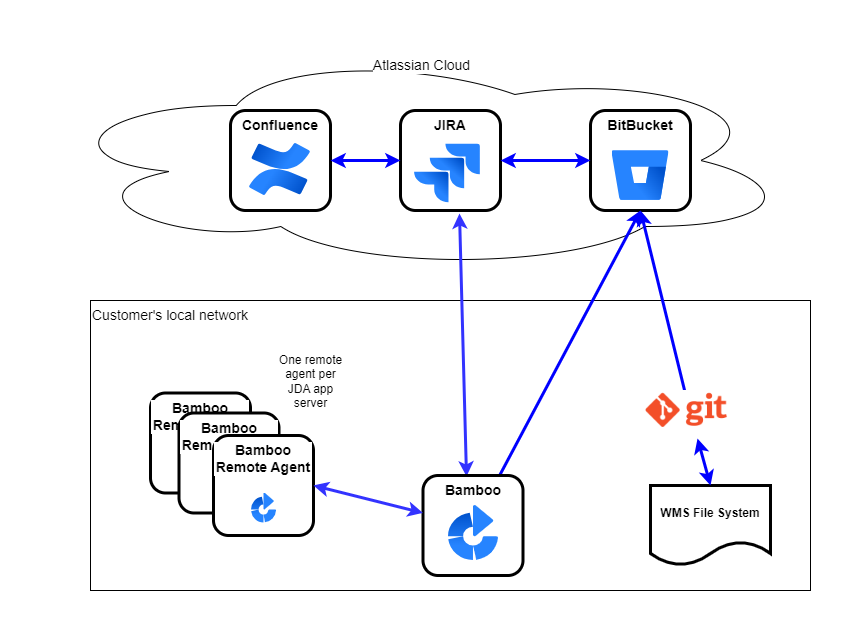
For the setup below, we assume the following configuration:


Other configurations are possible, for example:
- Use GitHub instead of BitBucket
- BitBucket can be hosted locally using BitBucket Data Center
- Jira can be hosted locally using Jira Data Center
- Instead of one repository, have multiple Git repositories (e.g. one for WMS, one for EMS and another one for LMS)
- More environments besides DEV, TEST and PROD.
Setup Version Control
Bamboo relies on a version control system to build the rollouts. Currently, the following Git-based version control systems are supported with the Bamboo Rollout Manager plugin:
To build the rollouts correctly, the 'LES' directory has to be version controlled, with the exception of a few subdirectories. Which sub-directories should be under version control depends on the Blue Yonder WMS product (e.g. WMS, HUB, Parcel), but generally all subdirectories besides the directories bin, build, files, include, install, lib, log, rollouts and temp.
For example, a version controlled LES directory could look like this: (note: this is a windows explorer view on a server with TortoiseGit installed)


Setup Git
Whether we use BitBucket or Github as the web viewer and main repository, we need to install git locally on the development environments.
Install Git
- install Git on one of the DEV servers. If we want to clone the version controlled files to local PCs of the developers, each PC also has to install GIT.
- Install a Git GUI client like TortoiseGit on the DEV servers and/or local PCs of the developers. This will make the daily git tasks - which is mainly committing code - a lot easier for developers.
Put the LES directory under version control.
Using git command line:
go to the LES directory
Type
git init.create a .gitignore file, with these contents:
build
log
install
temp
Type
git addto add all of the files.Type
git commit -m "initial commit".
Using TortoiseGit in Windows Explorer:
- right click on the LES directory and select 'Create Git Repository here'. Create Git Repo
- select all sub-directories that should not be version controlled and right click TortoiseGit → Delete and add to ignore list
- right click again on the LES directory and select 'Git commit → "master" '. Git Commit
Setup Bitbucket or GitHub
After installing Git on the DEV servers, we can link the (local) Git repositories to BitBucket or GitHub and use either one as the 'remote repository'. Bitbucket or GitHub is also the place where we can view the code and code changes as well as the system that Bamboo can connect to.
Setup Bitbucket Cloud
- Sign in or register with Bitbucket
- Create a new (empty) repository
- Push the content of the local git directory to the new repository in Bitbucket. It is explained in 'Import an existing Git project into Bitbucket Server'.
Setup GitHub
- Sign in or register with GitHub or login if we already have an account.
- Push the content of the local Git directory to GitHub as explained here
Setup Jira
We assume we have Jira Cloud setup. If not, refer to these online help pages to get started: Get started with Jira cloud
There are not many requirements for Jira related to the Bamboo Rollout Manager plugin, except the following two:
- Jira issues should be linked to a Version using the Fix Version field. Configure versions in a scrum project
- To make the BitBucket or GitHub code changes visible in each Jira issue, we need to link Jira to the repository:
Setup Bamboo basics
Install Bamboo
- See this link on how to Install the Bamboo server application
- Install Bamboo on the DEV server. It can be installed on another server as well, but these instructions assume the DEV server.
- The windows user that runs the windows service in bamboo should have permission to install rollouts in DEV (and TEST if that is on the same server). This typically means the permission to run the 'mload' utility.
- also, the windows user should have permission to stop and start the moca service on the DEV environment (and TEST if that is on the same server)
- Install remote agents on all Blue Yonder WMS servers. In our example, this will be the TEST and PROD server and potentially the REFS TEST and REFS PROD server.
- Link the BitBucket or GitHub repository to Bamboo.
- See instruction on how to link repositories to Bamboo.
Setup the link between the local Bamboo server and Jira Cloud.
The Jira Cloud instance needs to reach the local Bamboo server. For security reasons, this needs to be a connection that is only accessible by the Jira Cloud service. The solution is to have a proxy server on the edge of the local network and only allow requests from IP addresses coming from Atlasian.
These instructions provide different options on how this can be accomplished: Link Bamboo to Jira Cloud instructions
The Application Tunnel is not a feasible solution because we need to be able to reach Bamboo from Jira Automation, which doesn't support the Application Tunnel method.
Install the Rollout Manager plugin
From the Bamboo Admin page, go Manage apps -> Find new apps.
In the search box, type 'Rollout'. Select the 'Rollout Manager Plugin' and click Try for Free
Or, start with the plugin itself on the Atlassian Marketplace:
Install the plugin like any other Bamboo plugin as described here.
Setup Local Agent
For the Rollout building to work correctly, we need to setup a 'Local Agent'. A Local Agent is a worker process that can execute build and deployment tasks and exists inside the bamboo server. This is different from Remote agents which are separate processes usually on another server. See instructions to setup a Local Agent here.
Setup Remote Agents
Per a previous step above, all Blue Yonder WMS servers should have one Bamboo Remote Agent installed per server (not per Blue Yonder WMS environment, but one per server). See installation instructions here
Add Custom Capability for Perl
A requirement for the Bamboo Rollout Manager plugin is that we create a custom capability. Once the Remote Agents are istalled and visible in Bamboo Administration -> Agents -> Remote Agents, we need to add a 'Capability' to each Remote Agent, to specify where the Perl executable is.
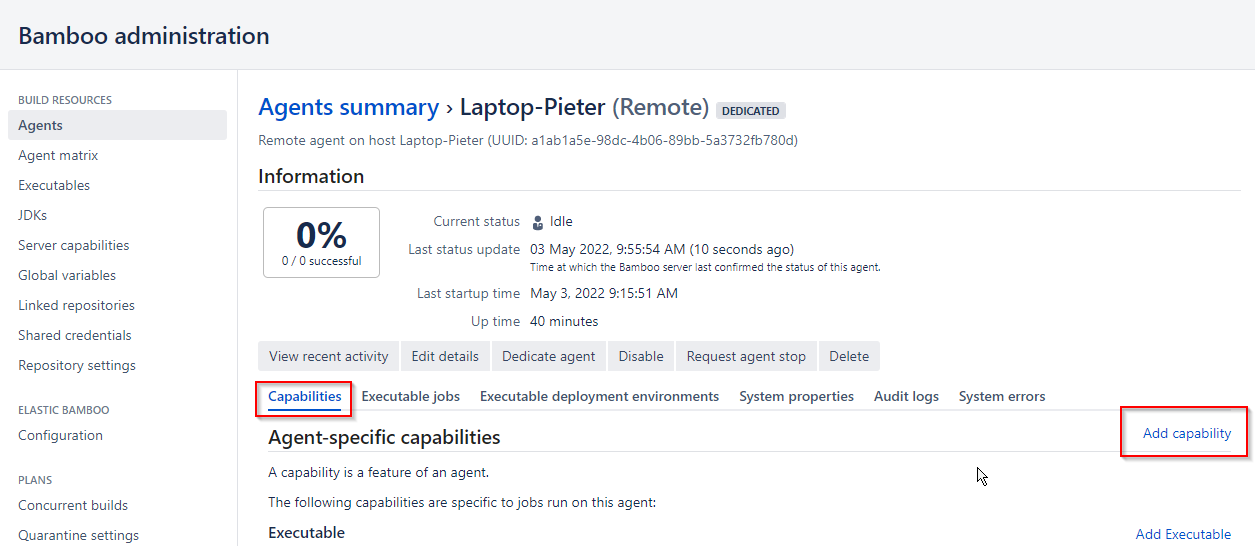
Click on the Remote Agent we want to configure. This shows the 'Agents summary' screen.

In the Capabilities tab, click on 'Add Capability'

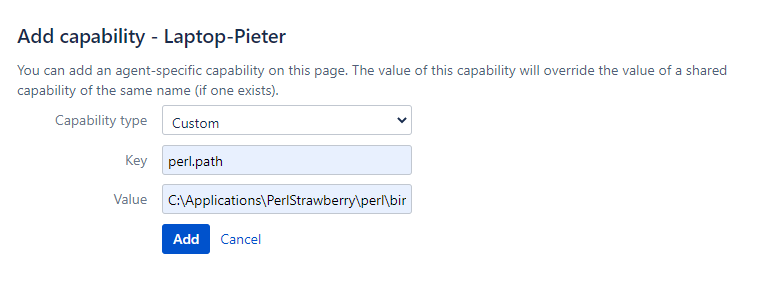
Add a custom capability with key perl.path. The value should be the absolute path to the Perl executable on the server where the Remote Agent is running. The path should include the executable name itself (e.g. C:\Applications\PerlStrawberry\perl\bin\perl.exe)
Next steps: build plan, Deployment Plan and Jira Automation Trigger
After the above is setup, we have the main systems in place. What is left to do is to define how and where we want to build rollout and where we want to install them. This is described in the next chapters:
- Setup build plan
- Setup deployment project
- Setup Jira Trigger to trigger a build in Bamboo when a Jira release is released.
Tips
Four Oaks Consulting provides services to assist in this setup. Contact Four Oaks Consulting for more information.

